How to flash Arduino Pro Mini
Author: genaonyx
Introduction
I welcome you, readers of our resource. Today we'll talk about one controller from the Arduino series, namely the Arduino Pro Mini. It's a small, compact controller that has all the advantages of Arduino, but it's very compact, you can say the smallest of all existing Arduino controllers at the moment. Many are also attracted by the price of its Chinese counterparts, and they cost from one to two dollars apiece (sometimes even less), which also makes one think about buying it. But there is one problem, it's not so easy to flash, especially the Chinese copies that are equipped with the Atmel ATmega168P processor, which the official Arduino Pro Mini controllers did not once equip, and as a result Arduino IDE refuses to flash them, reporting the wrong signature of the processor.
We'll talk about this today. How to flash, what is needed for this, and how to make Arduino IDE work with Chinese copies.
What is needed for this?
Arduino Pro Mini is very compact, and compactness requires sacrifice and sacrifice is a USB interface that is completely mowed in this controller ie. you can not connect the Pro Mini directly to the computer, and as a result you will need either a special USB adapter to TTL or another Arduino controller.
Next, we will discuss three ways how to flash Pro Mini and for all three ways we need something:
- The first way. Stitching through the USB adapter in TTL - you need the adapter itself in the amount of one piece.
- The second way. Stitching through Arduino UNO - Arduino UNO is needed, but not simple, but in the classic version, it's the Arduino, in which the processor is made in a DIP package and inserted into the black connector.
- The third way. Stitch through the SPI interface - you need any Arduino: UNO, Nano, Mega, Leonardo - it does not matter, the main thing is that there was a USB connector for connecting to a PC.
The first way. Flash through USB adapter in TTL
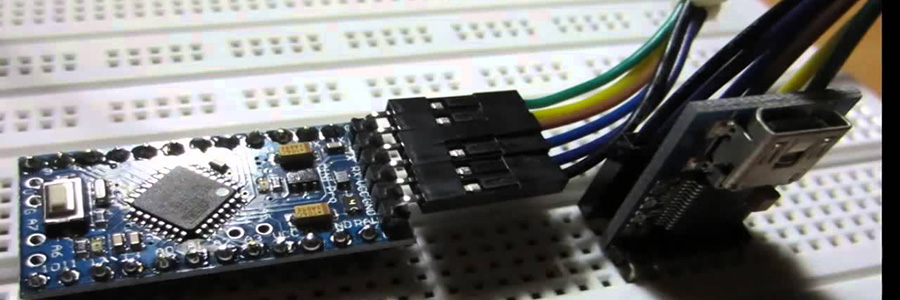
The first and easiest way to download your sketch in Arduino Pro Mini is to purchase a special USB adapter in TTL or as it is called a UART adapter. As a rule, this adapter is the part that was cut from Arduino Nano, turning it into Arduino Pro Mini. The cost of such adapters is a penny, but the choice is even greater. The Chinese have dug them so much that the eyes of one to choose which of them to choose. At the same time the price of this device is not more than one forever green. After you connect the Pro Mini and UART adapter with wires or a cable, it remains only to insert it (adapter) into the PC, install the driver (not all adapters they require) and that's it. Your PC will identify the adapter as the next COM port that appears when you connect any Arduino to your PC. Choose it, pay,
The only nuance in these adapters is the presence or absence of RST or DTR contacts. I recommend buying adapters on which these contacts are. They greatly simplify life and make the firmware process problem-free. If you have already purchased an adapter that does not have such contacts, then every time you download a sketch in Arduino, you have to press the Reset button, which is not always possible to do on time, and this introduces its own inconvenience.
Connecting the adapter you can see on the table below:

USB to TTL (UART) | Arduino Pro Mini |
RX | RX |
TX | TX |
GND | GND |
5V | VCC |
RST or DTR or GRN | RST or DTR |
The second way. Stitching through Arduino UNO
For this method we need a classic Arduino UNO. Classical this is the one in which the chip body is made in a DIP package and inserted into a special connector. Here we need to carefully pull this chip with a screwdriver. It is important not to break the processor, do it carefully, without bending your legs.
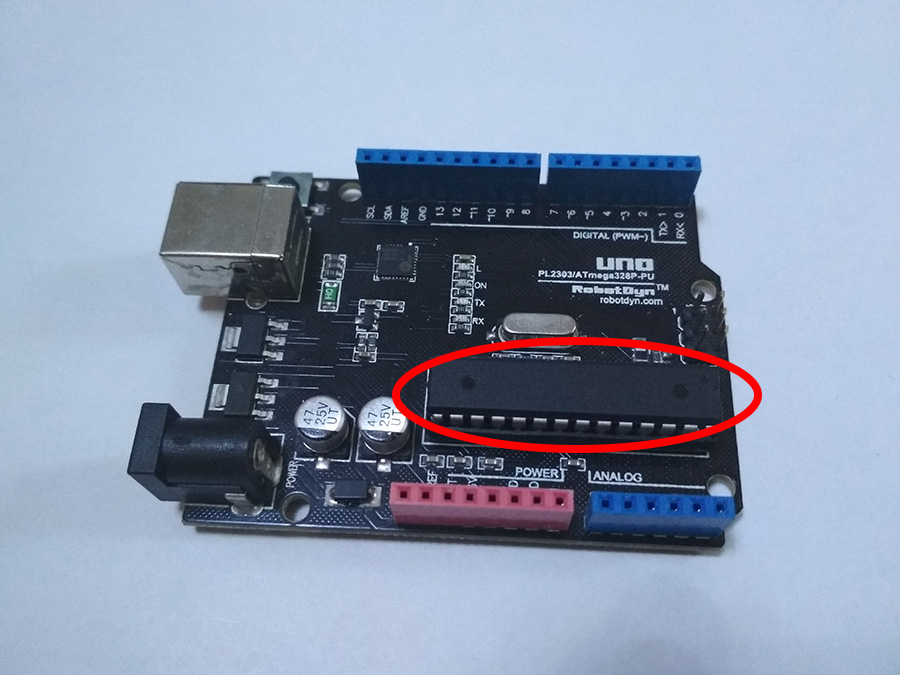
Arduino UNO. The processor is made in a DIP package.
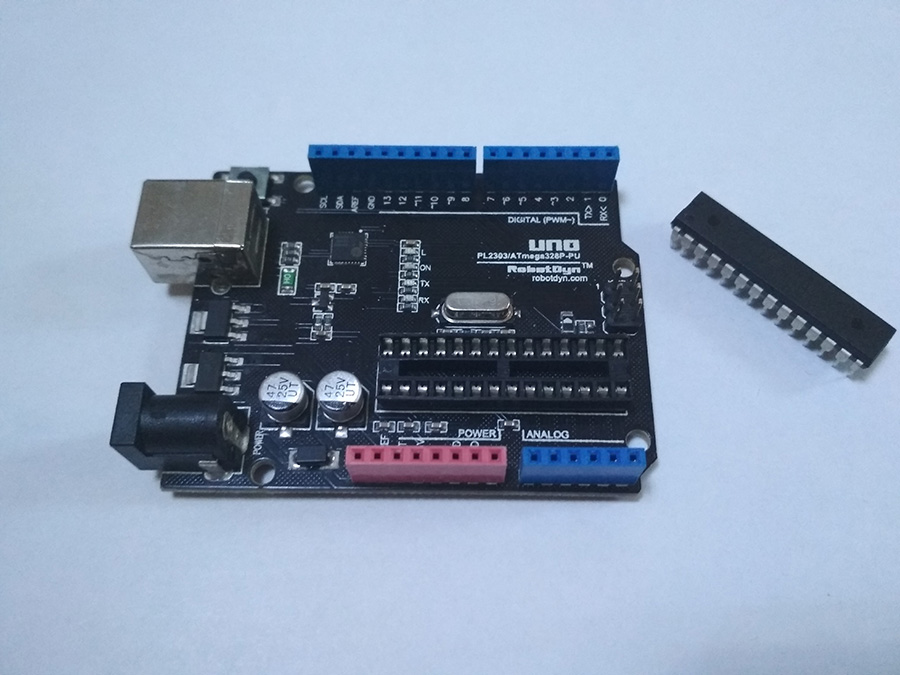
Gently pull up and pull out the processor with a screwdriver.
After we pulled the processor out of the Arduino UNO, we essentially got the same USB to TTL adapter, it only remains to connect the wires of our new adapter and Arduino Pro Mini according to the following scheme:

Arduino UNO (without CPU) | Arduino Pro Mini |
RX | RX |
TX | TX |
GND | GND |
5V | VCC |
RST | RST |
The third way. Stitch through SPI interface
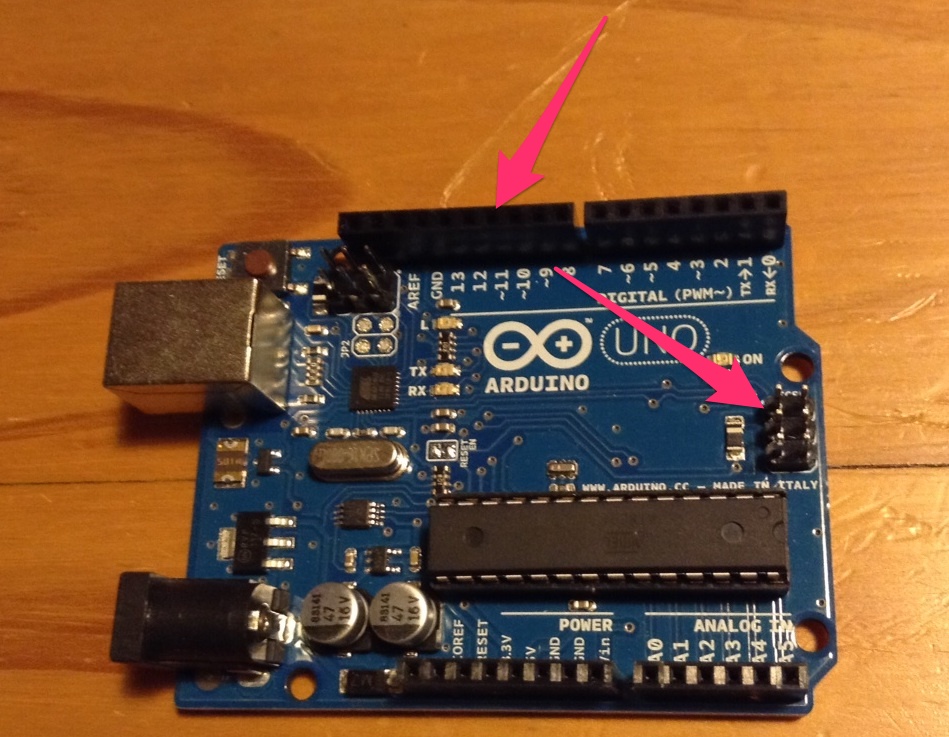 The third and most uncomfortable way to download your sketch in Arduino Pro Mini is to flash it using the ICSP interface. This interface is present on most Arduino boards. The main contacts of this interface are output to ports 10 to 13, as well as separately in the form of six pads with the ICSP signature. The shoe is located, as a rule, in the central right part of the Arduino.
In this case, the Arduino Pro Mini firmware should be divided into two stages:
- Firmware of Arduino board as ISP programmer.
- Configuring the Arduino IDE and loading the sketch into the Arduino Pro Mini.
- Run the Arduino IDE.
- File - Examples - 11.ArduinoISP - ArduinoISP.
- Tools - Fee - Arduino UNO.
- Tools - Port - Select the COM port.
- We compile and fill in the Arduino UNO.
Next, we need to connect the two Arduino wires according to the following scheme:
Arduino UNO (ISP) | Arduino Pro Mini |
5V | VCC |
GND | GND |
10 | RST |
11 (MOSI) | 11 (MOSI) |
12 (MISO) | 12 (MISO) |
13 (SCK) | 13 (SCK) |
Now open the Arduino IDE again. Open the sketch in it that you want to fill in the Pro Mini and perform the following actions:
2. Tools - Board - Arduino Pro Or Pro Mini
3. Tools - Processor - ATmega168 (5V, 16 MHz)
4. Tools - Port - Select port
5. Tools - Programmer - Arduino as ISP
6. Sketch - Download via the programmer
As you can see, sketch loading in this mode is necessary through the special menu "Download via the programmer", and not via the "Download" button on the main form of the Arduino IDE. This is the reason for all the inconvenience. If you press the "Download" button as you normally do, then you will fill the sketch in Arduino UNO, not Arduino Pro Mini, which will overwrite the programmer's sketch. Also, in this mode, the Serial class is unavailable, that is, you can not debug your sketch by exchanging messages on the COM port. Well, one more fly in the ointment is that after this flashing, in most cases, you can reflash the Arduino Pro Mini through the adapter in the same way. This is corrected by filling the new bootloader using the "Tools" menu - "Write the Loader".Add the Chinese Pro Mini to the Arduino IDE
As I said in this article, Chinese clones sometimes are equipped with processors that did not have the official versions of Arduino Pro Mini and as a result of their firmware you can see the following or similar error.
avrdude: Expected signature for ATmega168 is 1E 94 06
Double check chip, or use -F to override this check.
The wrong microcontroller is found. Did you specify the correct card in the Tools -> Fee menu?
The wrong microcontroller is found. Did you specify the correct card in the Tools -> Fee menu?
Fix it easily:
- First you need to open the folder where the Arduino IDE is located.
- Then go to the next folder "Folder with Arduino IDE \ hardware \ arduino \ avr \".
- We search for the file "boards.txt" there and open it in a text editor.
- Look for the following line in the file "pro.menu.cpu.16MHzatmega168.build.mcu = atmega168".
- And replace it with "pro.menu.cpu.16MHzatmega168.build.mcu = atmega168p".
- Restart the Arduino IDE and that's it.If you have for example 328 processor, then we do everything the same, just look for a line with 328 digits.
Conclusion
In this article, I cited as many as three options for sketching skins in Arduino Pro Mini. I personally use the second one. I like him more.
Post a Comment